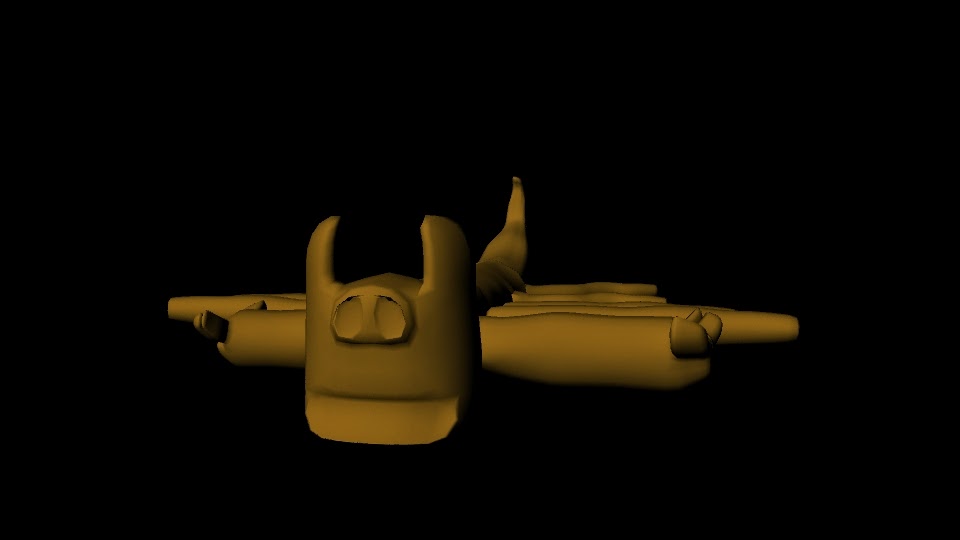
Monday, 15 December 2014

3D Character animation - The animation side.


For the animation Ali decided to create an two animation that would help him see how the animation would work out from the start to the finish.  

As Ali was going through the storyboard he discovered that he may have stretch himself to far as he had to squeeze all of these elements within 10 seconds as that was the time limit that he had to work with in order to meet the brief.

As Ali showed his work to the classroom he gained some constructive feedback from members of the classroom . One comment that stood out went something along these lines " The animatics seems to be more on the lines of storyboards not animatics". The animatics could use more animation within in the frames to show some form of movement.  I would focus on the most animated parts to keep the animation short yet appealing". From this Ali knew that he had his work cut out for himself as he had to take all of the feedback into consideration for animation not to mention the deadline .


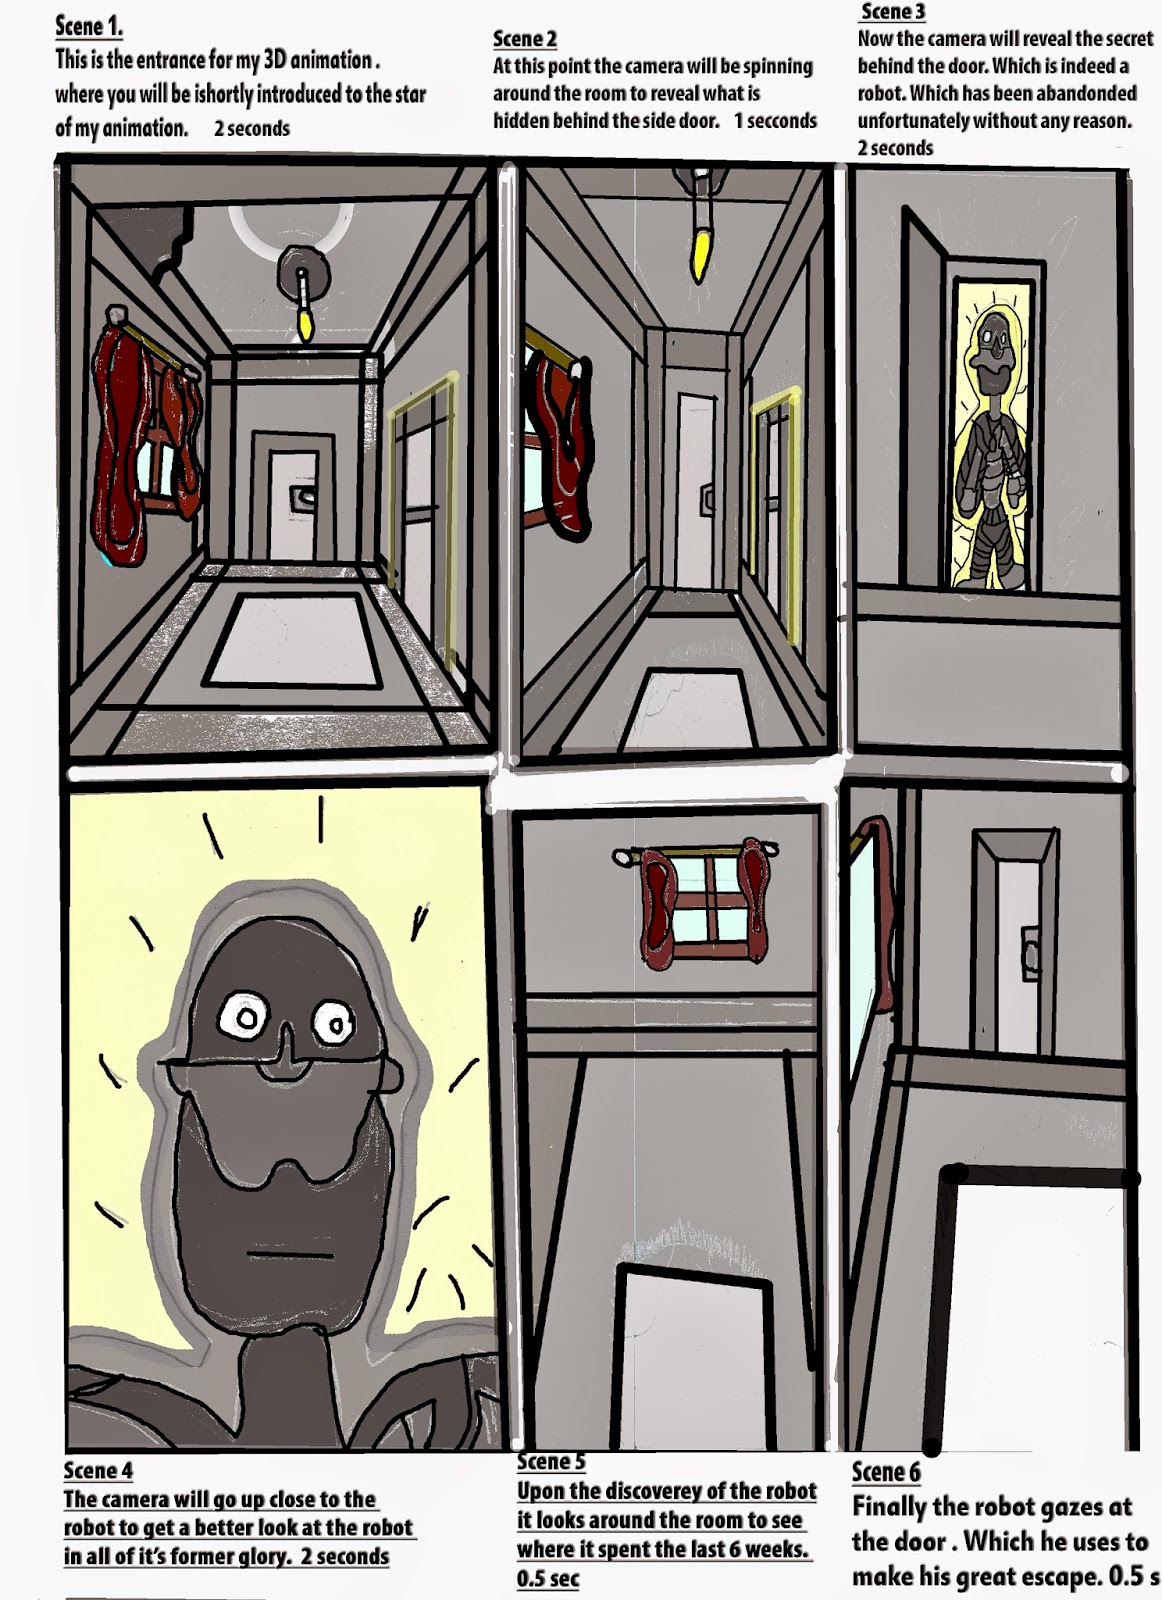
To show you what Ali intended to create for his animation he wanted to share his animatics with you to show the journey of his robot's revelation to the exit. Ali hoped that the story would be self explanatory but Ali is willing to give you a quick summary. 

The first storyboard displays the entrance point in the room leading to the door which is illuminating as something is waiting to be released. 

As soon as you go the door the robot will be revealed then the robot will observe the room. After the robot examines the room it spots the exit.


From these it makes it's way across the room towards the door. As soon as he arrives as his destination he says "yes freedom" . But destinty has something else in plan for it as the robot notices bars behind the door.. The robot's final words were " No no let me out".The story has a sad twist in the end where the robot thinks that it will finally be free but it is a cruel ending as it will never see freedom. 


Ali really enjoyed making the animation but there are a few problems that Ali had before he went onto the animation.Ali felt that he could have listened to his lecturers advice which was to use the morpheus rig from the internet when animting as it would have made his life easier.
Well Ali wanted to use his own rig but the result went different than he expected. Ali learned a valuable lesson always listen to your lecturer's advice the know what they are talking about .


If Ali was to compare his animation to an animation from the industry then he would compare it to the animation morph  in terms of pose to pose animation . But Ali is not saying that his animation is that good but he has tried to include the basic principals . 
Friday, 12 December 2014

3D Character modelling animation _ The texture

Previously Ali shared with us the first part of his 3D character modelling & animation project which was the modelling side. Now this week we are going to hear about the creation of the unique texture for Ali's character which was created in Autodesk Maya using the UV texture method .The texture was uploaded , edited in another  creative package which is known as Adobe Photoshop CC 2014. 


As you can see the texture may appear to be very odd which was not what Ali had in mind . But in terms of being creativity,originality Ali started to reflect on the appearance of his 3D robot character thinking"What a rather peculiar texture for a robot.The robot definitely gives a sense of neglect every single time  you look at it".
Ali personally felt that it would make perfect sense in his animation which would be based on a robot that finds itself in a lab rusting away waiting to be released. But faith has something horrible in store for him.


Ali once again must admit that he may have spent too long on creating a texture for his 3D character which may have decreased the time he could have spent on the next process which was the rigging. 

Ali feared that he may have repeated history as he had to create another animation but spent too long on texturing. This decreased his time on the rigging side which is quite a lengthy process. Ali knew that he had to make some sacrifices in order to keep to his deadlines.


Ali took the time t get some feedback from some of his classmates on his textured character in order to see how it would be perceived by members of the public. Most of them seemed to appreciate the overall texture as it did seem to have a rustic appearance. 

But the one key aspect that could be improved would be the transparency of the Robot . Ali was advised what to do with the texture in order to give his character a more bolder texture. Other than that Ali received some constructive criticisms  from a few of his classmates from the previous year.

If Ali could go over the whole process over again he would have made sure that he would have timed himself . This way Ali could focus on giving his 3D robot character a more bolder texture as he has one fear which is that he may blend into the background. 

But Ali knows that there are many ways around this issue as he now need to focus on the next phase which is the rigging process then skinning. They are both very long , complicated process which need time, dedication , and focus.


The main challenge was the UV Unwrapping process in Auto desk Maya 2014 due to the fact that Ali had to spend time rearranging the vertexes of his character in the UV window. Once Ali had completed this stage. Ali was wondering how he was going to get the texture completed on time. This made Ali give up on perfecting the texture of his 3D Robot. 

In the end Ali was left with a 3D robot which appeared to be  damaged , rusty robot which would now be the main focal point of his animation. The challenge for Ali is to make the 3D Robot stand out from everything else in his 3D animation . 


Once Ali had finished with the texturing process he began to focus on the rigging process . But before Ali could even begin to rig his character Ali knew that he had to clean his scene in order to clear any unusable nodes. This way Ali could focus on the more complicates steps in rigging later on during his process.

The Next part of the process will be very interesting as it will challenge Ali's organizational skills which will come in handy with one of the many process which need patience , and finally understanding.

If Ali was to compare the texture for his character in the industry then he would look compare it to the cartoon characters from South Park in terms if the graphic design . 


Monday, 1 December 2014

3D Character Modelling Assessment_ the robot.

The first task that Ali was set by his 3D character modelling & animation lecturer was to browse the internet using a number of search engines to obtain a robot that would be fairly simple to build but not entirely easy at the same time. Ali guessed the reason behind this was to test the capabilities of the class & how far they were willing to go to prove themselves to their lecturer.Whilst everyone went for a robot that already existed Ali decided to sketch a robot of his own as he wanted to be original. Ali was influenced by a number of images he found using Google search even Pinterest.


The one aspect that Ali wanted to get absolutely correct was the form of his character hence why he made sure that before he even began to construct his Robot in the 3D software known as Autodesk Maya. He created a plane from the primitives menu then he rearranged it in all of his view ports to keep them centred.This way Ali could find the reference point from all view ports in case he loses the reference image somehow. Once the plane was in centre he uploaded the image onto the plane by using a 2D checker in order to upload the sketch as a reference point. Once the reference image was there he changed the layer with the reference image as a reference layer so it could not be manipulated in any way.


From the beginning of the character building process Ali knew that he would have to keep on refereeing to his sketch just to make sure that he got every single detail spot on. Once he achieved 90% he knew that it was just a matter of focusing on the finer detail to bring his 3D character to life. Ali was very happy to see how his hard work had paid off as he felt that it was due to his previous experiences with 3D character animation .


The one aspect which really helped Ali was the one phrase which he had echoing in his head .This piece of advice was his lecturers stating " The lower the polygons the better the model will look in the end ". There was another reason for this was that it saves time when it come to the final stages which was rendering the animation frame by frame. It makes a huge difference to the time it takes to render an animation frame by frame. 


What did we have to do after every process to save time when it comes to cleaning up our characters unwanted nodes ?

One more piece of advice that Ali will never forget is to freeze transformation then reset the transformation for each stage as it cleans the scene up.This helps to make the next stage less complicated as you don't have to spend time cleaning up any unnecessary nodes in the hyper graph. Trust me this will save your life when it comes to the rigging process  as that it one of the most difficult process to get into your head. 


Ali already informed us that the next step would be to focus on the finer details to anchant us into giving his 3D robot character our undivided attention Ali is not sure if his 3D robot character would meet industry standard so he decided to compare his 3D Robot character to the main character from the 3D animation Robots .


If Ali could do the first process of this assignment all over again he would spend less time on his modelling / texturing . he would focus more on the next two stages as he already mentioned that they require more time , patience & definitely perseverance without a doubt. In other words 


Hopefully Ali would achieve his target in getting his 3D robot to a high standard which would be greatly received by the public as the 3D animation robots received. The next bog will be on the texture of Ali's 3D robot which will be an interesting read . Ali can assure you of that .

Wednesday, 8 October 2014

Character modelling & animation character 1

The brief was to construct a scorpion using the 3D software known as Autodesk Maya . The overall process of constructing the scorpion is to construct the bones(Rigging),Texture , Skin, and finally animate. Ali had just began his journey by taking the first steps on his long journey in order to create his 3D  scorpion animation. Ali went for the toon-shaded effect in order to create a scorpion that attracts a wider target audience. But Ali can ensure you that it is the first steps of creating a truly unique scorpion.


As you can see Ali  tried to include all of the main features that make the Scorpion eye-catching to the target audience's undivided attention. Although Ali spotted many areas that could be improved with time.He also knows that with time anything can be accomplished .


Here is another view port to show off Ali's scorpion in all of it glory as it possesses a nice solid form  from a side perspective.Ali just gave his scorpion a basic form as he felt that without looking at a scorpion in real life he will find it hard to really give it justice.


Here is a close up of the back which Ali wanted to show off as he believed that with a bit more time he could make it more  realistic in terms of a scorpion from reality. Ali may have continued this theme through out his work process. The final render is from a front perspective but with a twist to create a strong , powerful mood .


If Ali was to compare his work to a scorpion from industry he would use the scorpion /spider / green goblin ship from the spiderman cartoon comic . This is due to the quality of the first phase of Ali's creation but he begs you to go him more time to deliver better results . As Ali believes that the construction of a 3D character model & animation is similar to wood work.Ali started off with a piece of wood which would eventually transform from a rough object to a pure defined object .


Monday, 19 May 2014

Shadow and Tonal Values

To introduce the topic of today's observational drawing session you will find that it is based on shadow & tonal values. It is evident from looking at this graphite study of the artist himself that he was able took a number of values into consideration during the process.The artist has tried his best to make these elements obvious in the self portraits within a number of areas .

If one were to discuss what stood out to them when they first saw this sketch they may mention the most omnipotent element created in this self portrait is the self created shadows.The highlights created by the putty rubber provide the perfect balance of lightness/darkness in order to have a well composed self portrait.

Taking these points into consideration the artists may want to focus more on his observations when creating a self portrait by looking into the mirror. This proved to be very difficult as it was his first time recreating himself in a sketch form using a mirror. This proved to be a ver difficult task as he had to make sure that he was getting the crucial parts down first then implying the smaller areas afterwards .It is the artist's belief that this can only be improved with more observations of the subject & more practise which makes perfect self portraits. 


Thursday, 8 May 2014

Perspective of curves .


This sketch was a reconstruction of the artist's living room which was mainly focused on the archway as a primary point. The artist himself attempted to recreate the interior of his living room with the use of foreshortening in order to obtain the correct dimensions for all of the pillars , doorways , windows etc. 

The succeful part of the sketch was much later on as the artist went from creating impression lines to  definite lines. This method has proven to make the live this artist easier as they figured out what elements of the drawing would work & could be improved . However there are areas of the sketch that could be improved to really match it to reality. 

The main area of concern is the fact that the circumference of the floor is wider in reality. This may be down to lack of accurate measurements from the rm chair to the door. The artist tried to improved this with the use of self shading to create a larger space for the floor .

The other areas of concern may be the direction of the fireplace which appears to be out of flow with the arm chair. The form of the sofas could be defined better by incorporating highlights to make them stand out from the background. This is the reason why the artist started off by using the graphite stick gently gradually increasing the weight to make a solid drawing.Other than that the drawing has been successful overall. 


Monday, 5 May 2014

Classical interiors

This is a charcoal willow study of the artist's television room which the artist believes could be considered as classical / contemporary. architecture. In order to bring out the depth of particular areas within the sketch the artist has tried to go heavy on the charcoal to show the tonal values of the television room as well as the hallway. 

There are certain elements of the sketch that you might be able to notice immediately that do not work as they seem orthodox. In this case the first place that is out of alignment is the doorway which appears to be leaning towards the left side which may have been down to the artist maybe losing focus as they were to busy trying to measure the distance from the poster to the sofa , as well as the stand from the poster. The main attraction for the artist is the sofa which has been well defined by the tonal values. 

The artist has tried to rescue this drawing by incorporating the light which dominated the room. But the artist struggled to define which areas were mainly shaded or redefined by the highlights. The artist felt that maybe this was one of the main elements that did not let this sketch reach it's full potential.The artist also felt that they may have got carried away with the smudging technique that the  television room lost it's importance . Where as the hallway seems to be more potent due to the fact that there is minimum highlights. 

Overall the artist is fairly happy with their drawing but they wish that they could have done more to bring the reality to the paper. 


Monday, 21 April 2014

Anatomy & Movement

This particular topic proved to most useful as it allows animaitors to observe the way they move in motion. From examining this sketch the animator can tell the weight / balance that the subject is showing as he is sitting on a sofa focusing on his aunty's phone . 

But the artist's major downfall was not being able to draw all of the motions displayed by the subject as they moved from one point to the next point. However the artist could benefit from making more gesture drawing as the subject may not appreciate staying in one position for more than five seconds. The artist could have used the negative space to cover the background in order to make each pose stand out.

The artist also used made sure that they used the angles of the subject to their advantages as they resembled arcs.This immediately reminded the artist that animators use this technique in all of their animation as it allows them to create an animation with an continuous flow as apposed to a jumpy animation flow.

The artist made sure that they used the charcoal as light as possible to display the contrast betwen self shadows & direct highlights. It is these elements which gives the person a three dimensional form.The artist does feel happy about the first pose which has been completed but they are not sure about their feeling regarding to the next few poses .